
How to Wear a Backpack for Hiking: Adjustment Guide
Learning how to wear a backpack for hiking requires a repeatable sequence with the real load. Loosen the harness, place the pack on safely, establish belt position, draw the shoulder straps into contact, set any load-control straps and then test movement. Recheck after the load settles instead of tightening every strap at once.
This is a practical adjustment method, not a medical guarantee. Stop the test when there is pain, numbness, restricted breathing, loss of balance or hardware failure. A pack that cannot be adjusted to the individual and load should be rejected or refitted rather than forced into position.
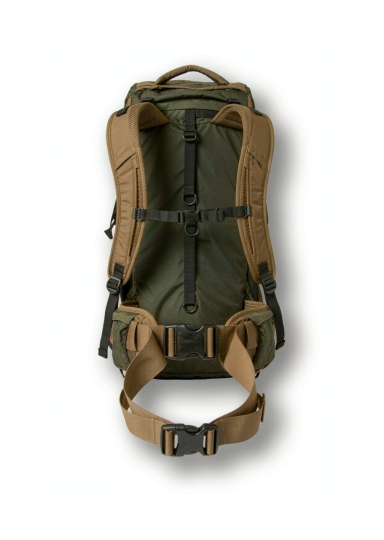
Hiking backpack with an adjustable harness, padded hip belt and contoured shoulder straps, on a clean white background.
Prepare before learning how to wear a backpack for hiking
Define the route and pack appropriate equipment, food and water before fitting. National Park Service hiking guidance places preparation and the complete load in the route plan. An empty showroom fit cannot predict how the harness behaves when dense items and consumables are present.
Use the CHUTIST backpack category to identify candidate formats, then confirm adjustment features and dimensions on the exact sample. Do not assume every backpack has load lifters, an adjustable torso or the same belt design.
Arrange and secure the load first
Place dense items close to the body and control rigid edges. Secure water, tools and exterior equipment so movement in the bag does not imitate a harness problem. The starting load should represent the route rather than an arbitrary test weight.
The sports backpack weight-distribution guide supports the packing step. This page owns the next decision: how the user puts on and adjusts the already controlled load.
Loosen straps and lift from a stable position
Before donning, loosen shoulder, sternum and load-control straps enough to avoid twisting. Use a bench, vehicle edge or another stable raised surface when the load is difficult to lift safely. Keep buckles and loose webbing clear of the ground and feet.
Slide one arm and then the other through the shoulder straps without swinging a heavy pack by one strap. Center the body of the pack before tightening. If lifting the defined load is unsafe for the user, change the handling method or seek assistance.
Set belt position before shoulder tension
Place the belt on the intended pelvic contact area for the individual and buckle it without trapping clothing. Tighten evenly until the load is supported and the belt remains level during a few steps. The exact position depends on the user's anatomy and the harness design.
Check that padding wraps sufficiently and adjustment travel remains in both directions. A belt that bottoms out, overlaps incorrectly or migrates cannot be corrected by excessive shoulder tension.
Bring shoulder straps into stable contact
Pull the shoulder adjustments evenly until the straps follow the shoulders without an unresolved gap or edge pressure. The goal is controlled contact, not maximum tightness. Observe the point where each strap leaves the pack and whether hardware rests on a sensitive area.
Walk several steps and move the arms. If the belt rises or the shoulders carry nearly all of the load, return to the belt and torso relationship before tightening further. Change one adjustment at a time so the effect remains visible.
Use load lifters only when the pack provides them
If load lifters are present, tension them gradually to control the upper pack without crushing the shoulder strap or pulling the harness out of position. Their angle and effect depend on pack geometry; a universal angle should not be assumed without manufacturer guidance.
Release and retension them while walking to understand the change. If the straps do not influence load position or create pressure, record the result and inspect the fit rather than using more force.
Position the sternum strap without restricting breathing
Set the sternum strap at a comfortable height that prevents unwanted shoulder-strap spread. Buckle and tension it only enough to stabilize the harness. Confirm full breathing and arm movement under the expected clothing.
Move the strap when it crosses the neck or creates concentrated chest pressure. If the available adjustment range cannot provide a safe, usable position for the individual, the harness may be unsuitable.
Run a loaded movement circuit
Walk on level ground, climb and descend steps, make a high step, rotate the torso and reach for water. Record belt migration, shoulder pressure, rearward pull, bounce, strap slippage and the number of corrections required.
Repeat in the thickest ordinary clothing state and after removing representative water or food. The correct settings may change as layers and consumables change, but the sequence should remain understandable and repeatable.
Recheck after the first movement period
Pause in a safe place after the load has settled. Confirm the belt remains level, shoulder straps still follow the body and no buckle has moved. Make small changes rather than restarting every adjustment simultaneously.
Record any hot spot, numbness or balance problem and stop when symptoms persist. This observation supports equipment selection; it does not diagnose a condition or prove injury prevention.
Save settings for repeat use
Mark or record torso position, belt setting and key strap references when the pack is shared or repeatedly removed. Refit from loose settings to confirm another user or evaluator can recreate the accepted result.
Inspect webbing tails, keepers and hardware after adjustment. Loose ends should not snag or interfere with access, while enough adjustment range must remain for clothing and route changes.
Practice small adjustments without removing the pack
In a safe standing position, practice easing and retensioning one strap at a time. The user should be able to respond to clothing or consumable changes without losing control of the load or confusing the accepted sequence.
Record which adjustments can be made while worn and which require the pack to be set down. If hardware is unreachable or slips after correction, inspect the harness before continuing.
Conclusion
Use a consistent sequence for how to wear a backpack for hiking: secure the load, establish belt support, bring shoulder straps into contact, set optional load controls, position the sternum strap and verify everything through movement. For a fitting discussion, send CHUTIST the load, user range and required harness functions.
Sources
Source: National Park Service: Hike Smart


